Taking on someone new
By the end of this page you will have taken someone from a first enquiry through to being accepted into a service, with a Case Worker assigned and their consent recorded.
This is the longest job in the system. It is one form in three steps, and the system saves your place as you go.
The pictures in this manual were taken on one organisation's system. Yours uses some different words. The buttons, and where they sit on the screen, are the same.
| Where a picture says | Your screen says |
|---|---|
| Care Journey | Service Episode |
| Entry | Referral |
| Kaiāwhina | Case Worker |
| Whānau | Service User |
Before you start
Have these to hand:
- The person's name and date of birth
- Which service you are referring them to
- Who referred them — the agency or person
- Whether they have consented, and how
The button only appears for staff in an intake position, and for supervisors and programme managers. Case Workers do not see it — work reaches them already allocated. If you think you should have it and don't, ask your administrator to check the positions on your services.
Starting a new entry
Click + New Referral at the top right of the screen.

The form opens on step 1 of 3. A bar across the top shows which step you are on.
Step 1 — Who they are, and why
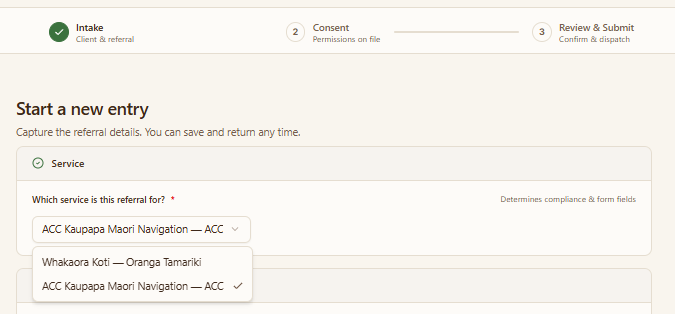
Choose the service first
Pick the service from the list before you fill anything else in.
Find the person
Click the search box and start typing their name.
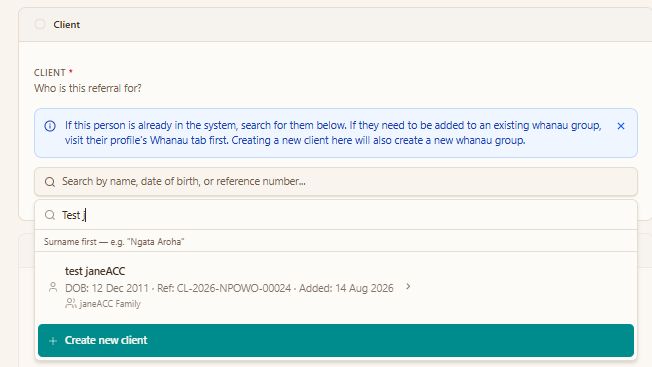
- If you find them — click their name to select them.
- If they are not there — click Create new client and fill in the short form.
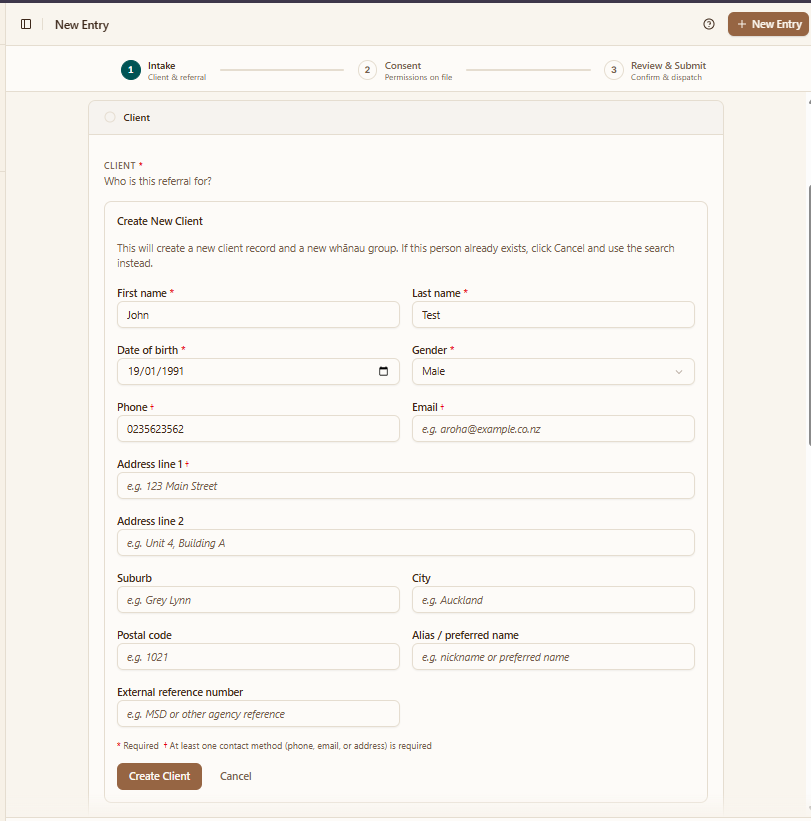
Creating someone new here also creates a new whānau group for them. That makes a duplicate more disruptive than it first looks — their history ends up split across two records. Search first, even if you are fairly sure they are new.
If the person you pick already has other open Referrals, a warning appears once you select them. Read it before you carry on.
Say why they are coming
Fill in the details of the enquiry itself — how urgent it is, when it came in, how it reached you, and what it is about.
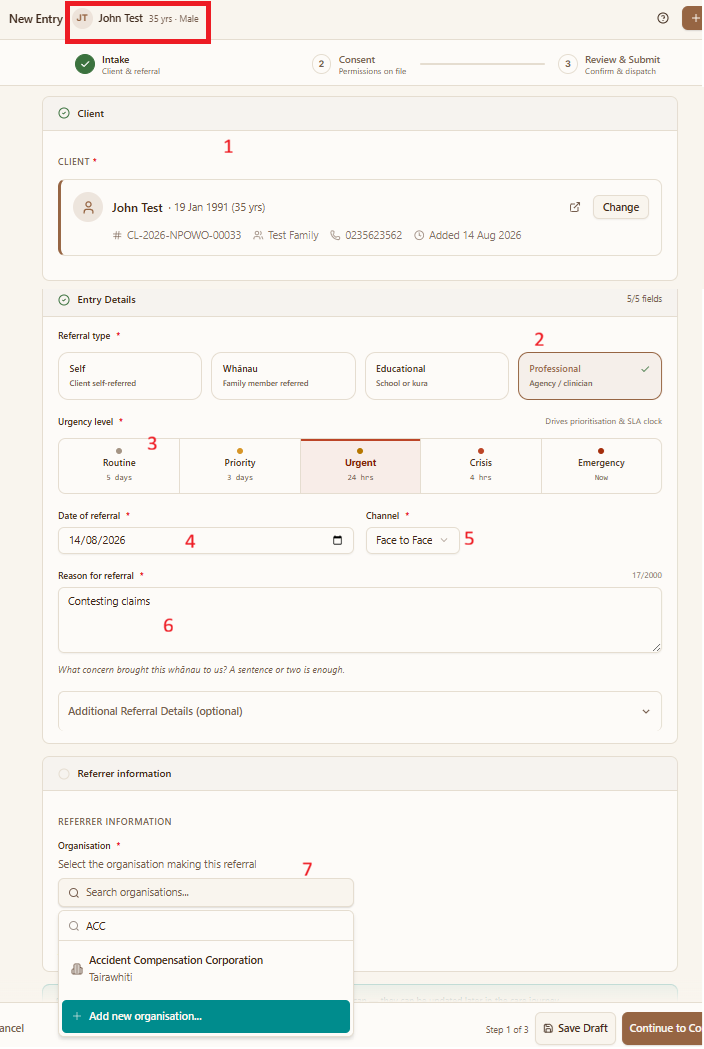
Working down the numbers:
- Who it is about — the person you picked a moment ago. Change swaps them if you have the wrong record.
- Referral type — who made the enquiry: the person themselves, a family member, a school, or a professional.
- Urgency level — this one matters. It sets how long you have before the first contact is overdue, shown under each option.
- Date of referral — when it actually reached you, not the date you are typing it up.
- Channel — how it arrived. A phone call, an email, in person.
- Reason for referral — a sentence or two, in plain words.
- Organisation — who referred them. Type a few letters to search; if they are genuinely not there, you can add them.
Say who referred them
Search for the referring agency, then add the person's name there if you have it.
Underneath, you may see extra questions specific to the service you chose — often about risk. These change from service to service.
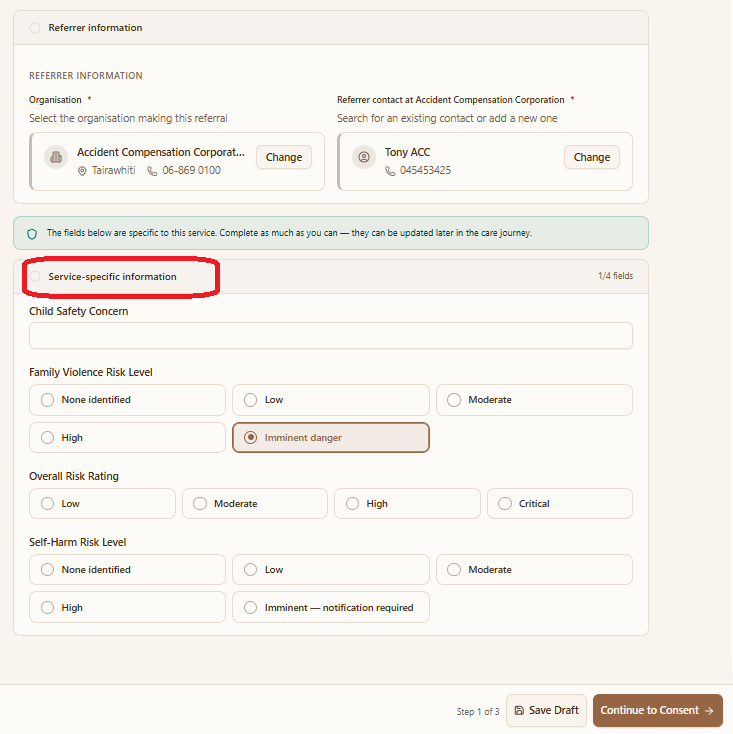
When the page is complete, click Continue.
Clicking Continue at the end of step 1 creates the record. It gets a reference number and sits as a Draft. From here you can safely close the page and come back to it later.
Before you click it, nothing is saved.
Step 2 — Consent
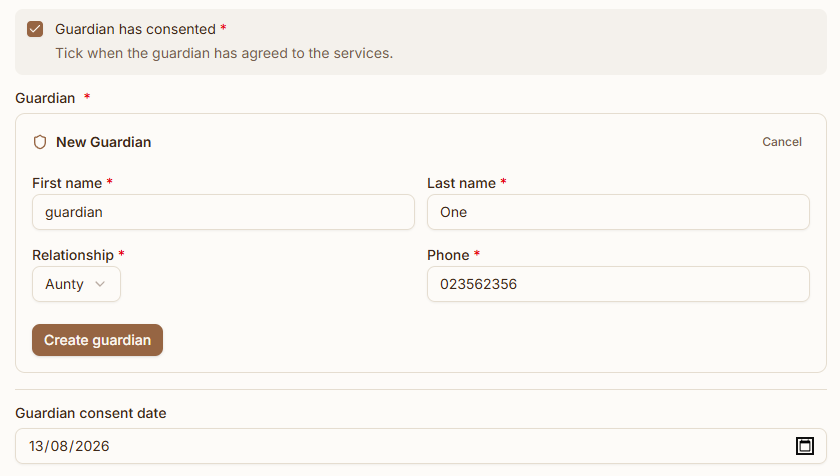
If they are under 18
Add the parent or guardian who is giving consent, and say how they are related.
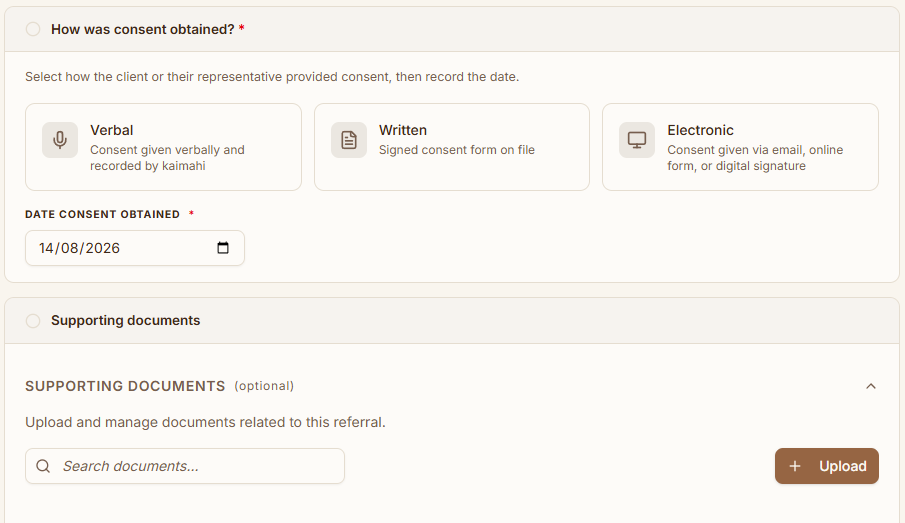
Record how consent was given
Say whether it was verbal, written, or electronic.
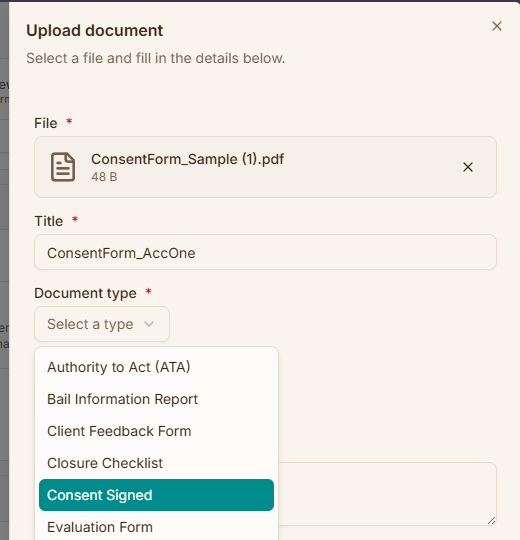
Attach the paperwork
If you have a signed form, upload it. Click Upload, choose the file, then tell the system what kind of document it is.
Tick what they have agreed to
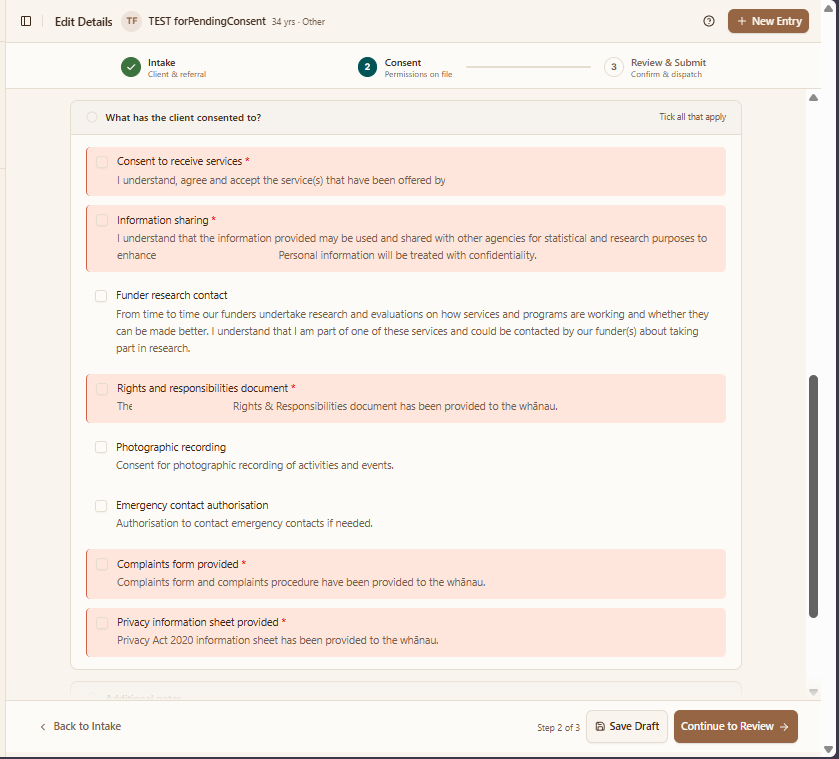
Step 3 — What happens to it
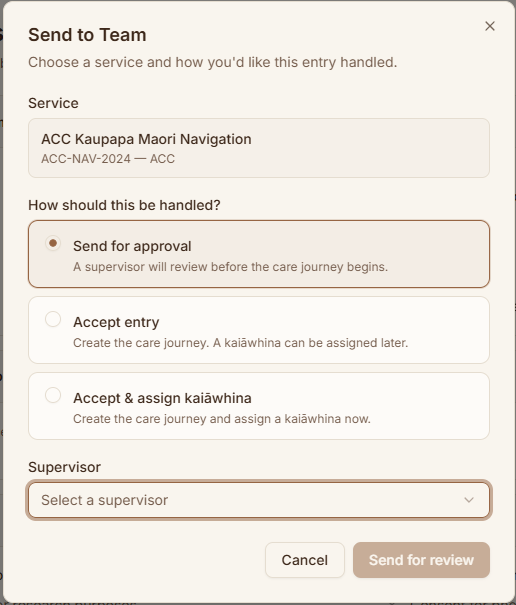
This is the decision. You have three choices, and which one you pick depends on how sure you are.
Option 1 — Send for approval
Use it when you are not certain they meet the service's criteria, and you want a manager to decide.
Choose the supervisor or manager who should look at it.
Option 2 — Accept
Use it when they clearly meet the criteria, but you are not ready to say who will work with them.
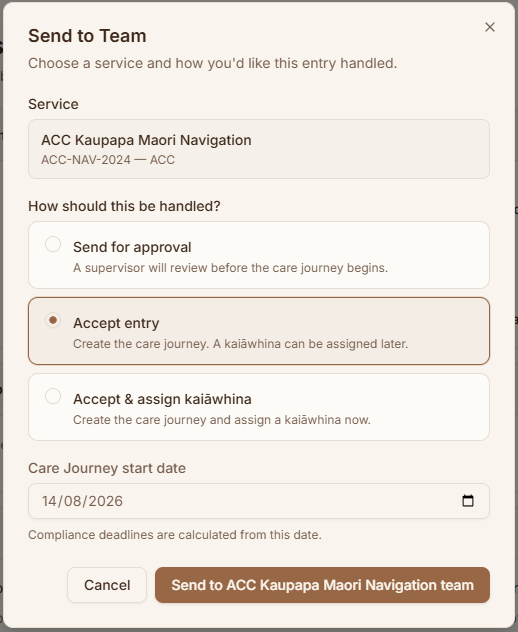
Deadlines for consent forms, assessments and other paperwork are all counted from this date. If the work actually started last week, change it now — it is much more awkward to fix afterwards.
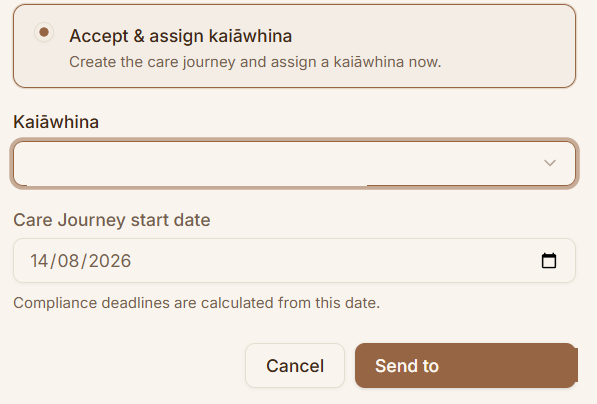
Option 3 — Accept and assign
Use it when you know both the service and the person who will do the work.
Done
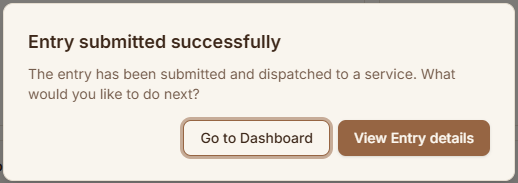
Filling in the rest
Accepting someone does not mean their record is complete. Open them from your list and work through the tabs when you have time.
Intake info
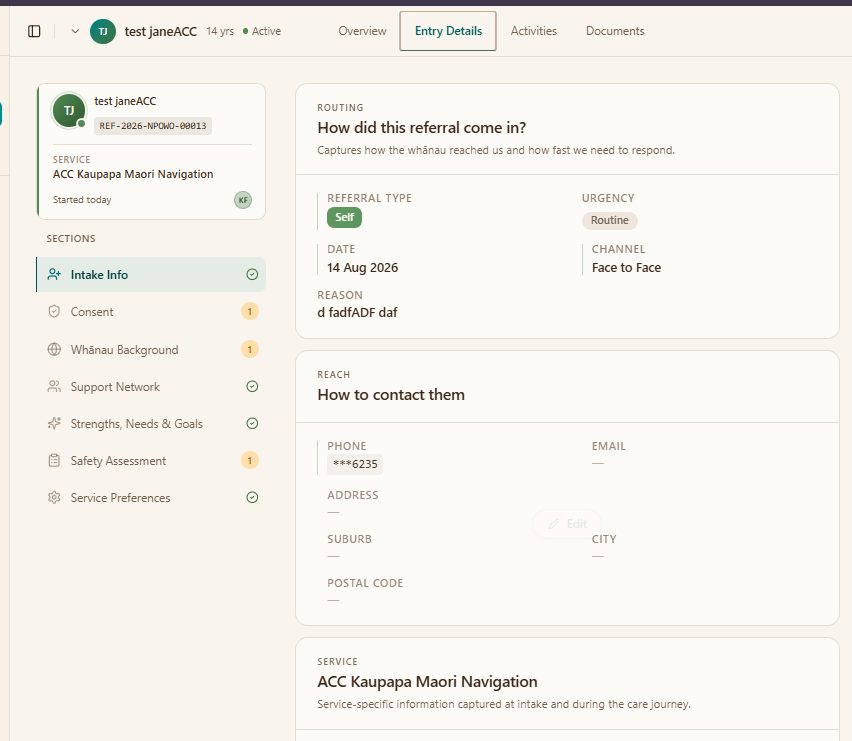
Family background
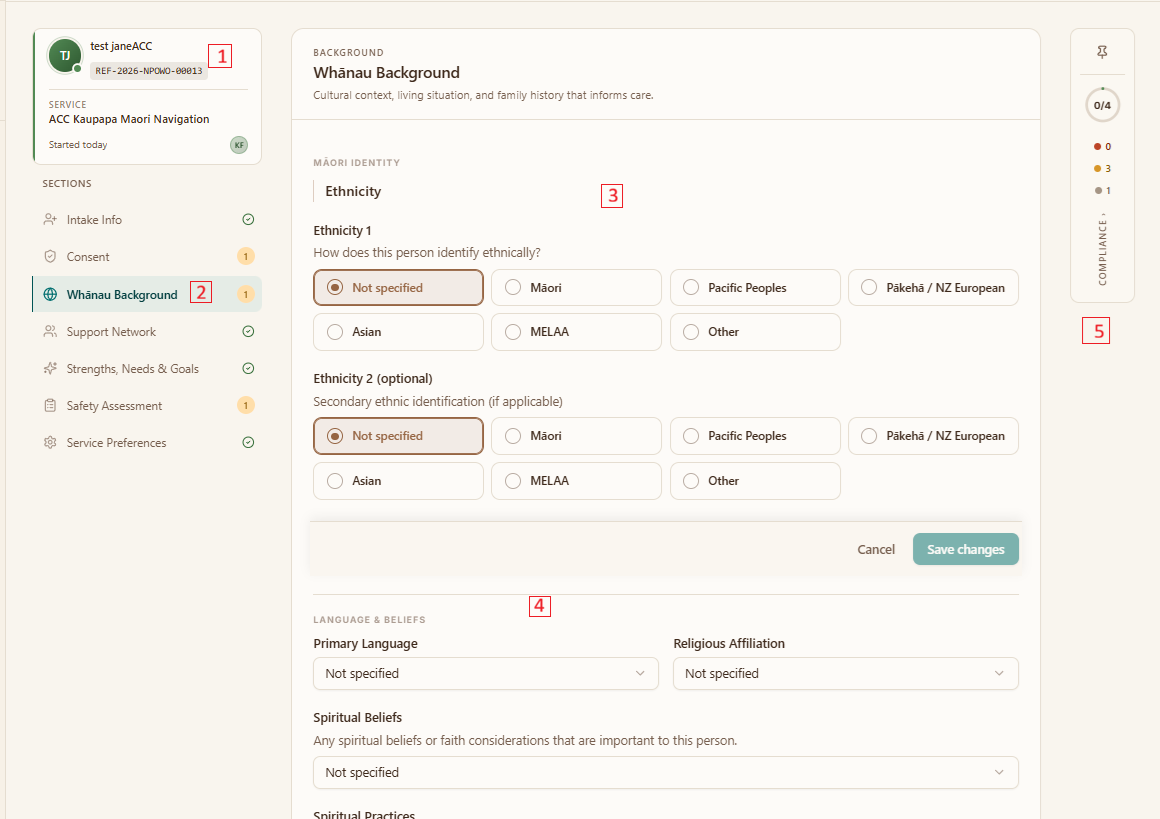
- Who you are working on — their name and reference number, always in the top corner.
- The section you are in — the list down the left is every part of their intake. A number beside one means that many things are still outstanding.
- Ethnicity — how the person identifies. There is a second, optional one for anybody who identifies with more than one.
- Language and beliefs — first language, religion, anything spiritual that matters to how they are supported.
- The compliance strip — the running count of paperwork still due. It follows you down the page.
Fill in what you know and click Save changes. Leaving something as Not specified is a real answer — better than a guess that ends up in a report.
Who else is around them
The support network is everyone else involved — whānau, and professionals from other agencies.
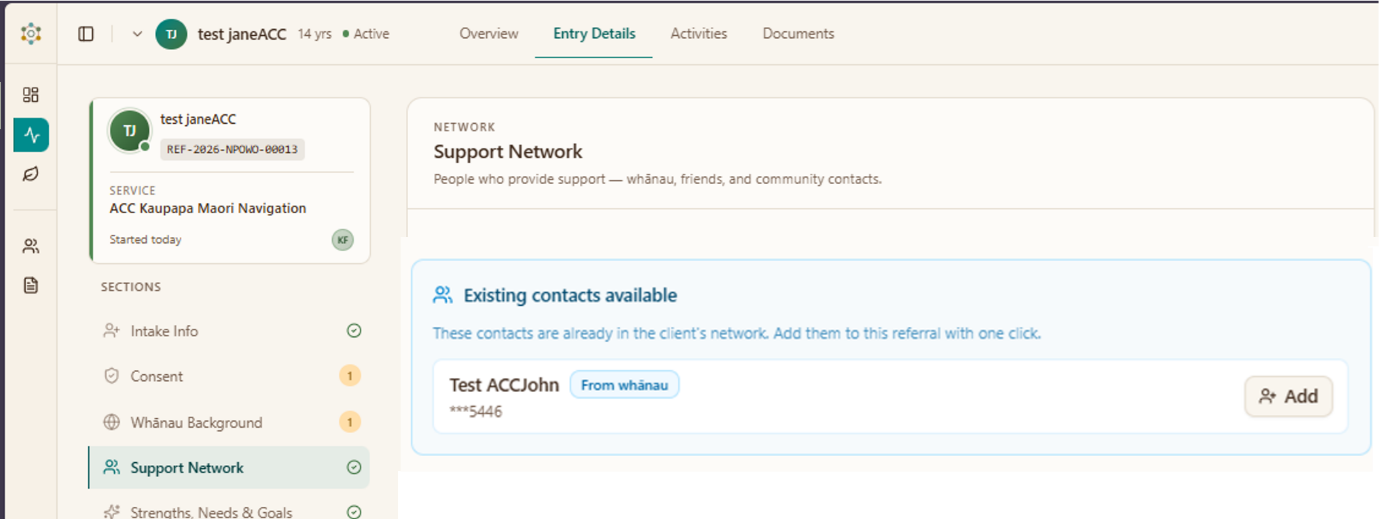
To add someone new, click Add contact and fill in the form.
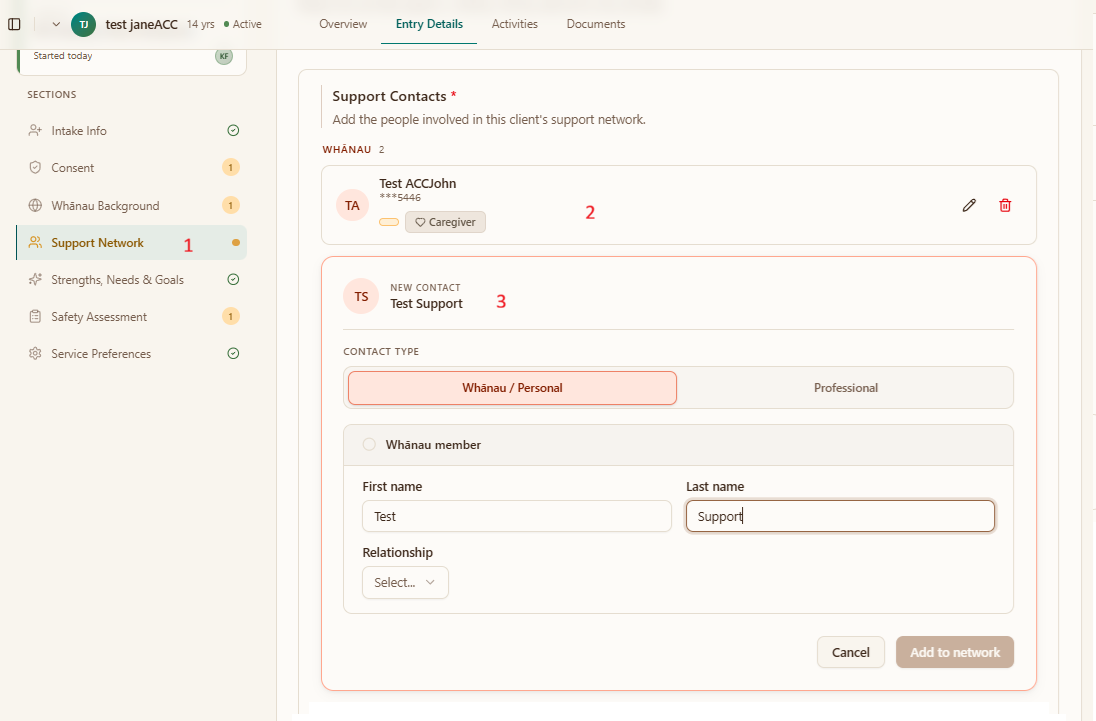
- Support Network in the list down the left — where you are.
- People already added — each one shows how they are related. The pencil edits them, the bin removes them.
- The new contact — say whether they are whānau or a professional first, as it changes the questions underneath. Then their name and how they are related.
Click Add to network when you are done. Nothing is saved until you do.
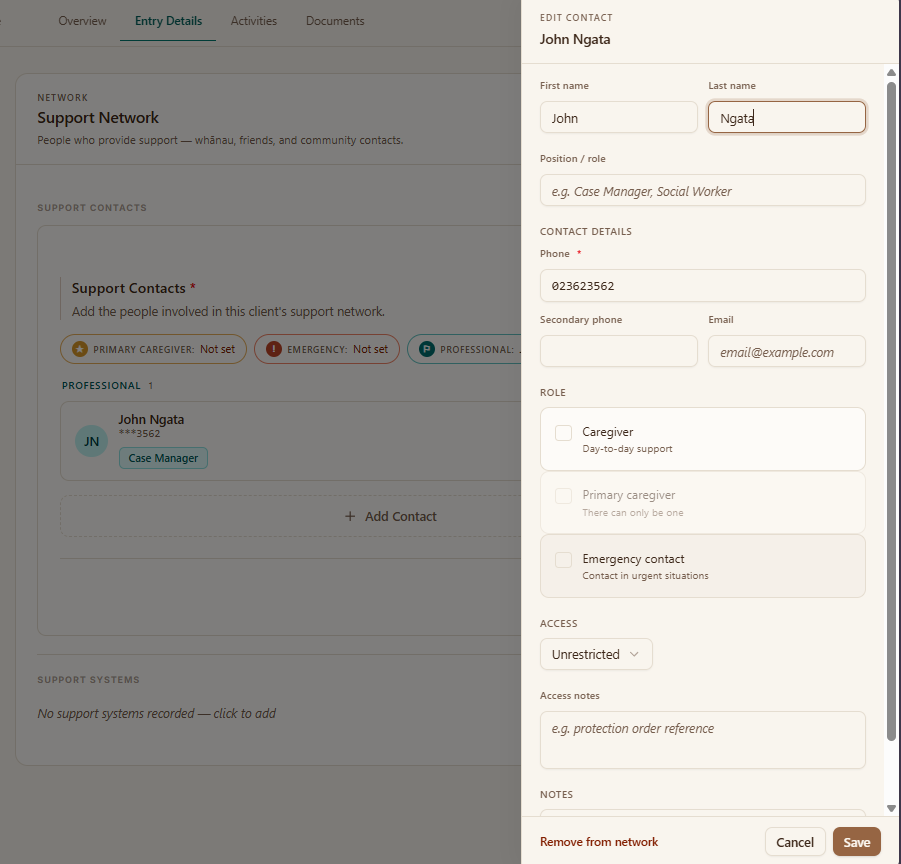
To change someone already there, open them and edit.
If it does not look like this
- No + New Referral button — you are probably in a Case Worker position, which does not have it. See the note at the top of this page.
- The service list is empty — you have not been given a position on any service. Your administrator fixes that.
- The risk questions never appear — you have not chosen a service yet. Choose it first and they load underneath.
- You lost what you typed — you had not reached the end of step 1. That is the point where it saves.
What next
- Working with someone — what to do once they are accepted
- Writing up what you did — visits, calls and notes